Page History: Cheque Run Process
Compare Page Revisions
Page Revision: 19/08/2011 12:37 PM
Cheque Run Process
After each show has finished and the results for the competition have been entered, the client may decide to perform a cheque run (not all shows do this, some pay out prize money in cash on the day e.g. Royal Bath & West).
The cheque run process is based on the following steps:
1. Set the starting cheque number
2. Review the cheques to be created (Showbiz should amalgamate the prizes and other payments per exhibitor)
3. Generate a report for reference
4. Determine cheque template for use
5. Create the cheques
6. Update the exhibitor accounts with the relevant transactions
Clients can choose to take into account any under or overpayments made by the exhibitor contact and take these into account when generating the cheques.
Cheques tend to be of two main types:
• Cheque only
• Cheque plus remittance (list of items for which the money is to be paid)
NB. Issues in the past with this process have included:• Cheque run templates running out of space for all of the items listed in the remittance (i.e. don’t fit onto one page).
• An inability to limit the cheque run by heading or section.
Considerations
Before running the cheque run, the following considerations should be thought about:
• Database backup.
• Ensure that the client show has a copy of the report for reference.
• Perform a test run on blank paper.
Guide to Process1) Select Tasks > Entries > Prizes & Forwards Cheque Run

2) Select the template in the dropdown box.
(You will have to create the template initially and set the relevant path from the Utilities > System > Document Location menu.)
(More information on creating Templates to follow)
3) Type in your Start Cheque numer and the number of items you want on one page.
4) Select relevant options for option 2 and then Process Cheques.
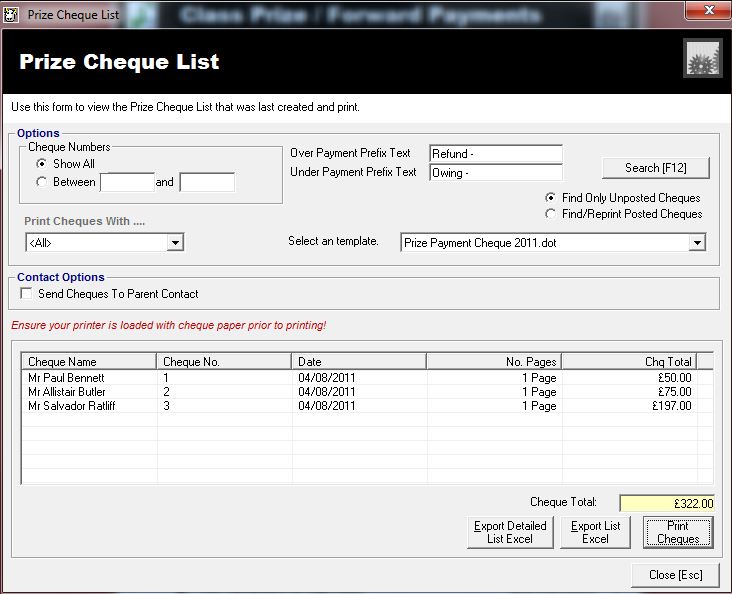
5) Go to Option 3. View and print prcessed Cheques > Cheque List and print out your cheques.
 NOTE:
NOTE: Lines highlighted in yellow indicates that no cheque name was caputred for that contact, you can correct this by capturing the cheque name in the
Contacts > cheque name field. Your cheque numbers will not order by cheque number until this has been corrected.

6) After you have printed your cheques go to Option 4 and Post your Transactions.
7) You can now go to Accounts > Export Accounts to export your accounts to Sage. (See Exporting Accounts to Sage)